Before you Begin
This guide will walk you through installing the Bulldog motor onto your existing valve and is applicable for every Bulldog kit excluding integrated valve kits. Please follow the guide step by step and take note of the additional information beside videos and images. Our commitment to exceptional customer support sets us apart. If any issue still occurs after following this guide our dedicated team of real humans is always ready to provide personalized support, ensuring that every experience with our products is seamless and easy.
Tools:
Phillips #2 Screwdriver
Time Required:
10 – 14 Minutes
Difficulty:
Medium–Hard

Steps:
7
Important Notes:
5
Step 1
Find the Bracket for your Valve Type
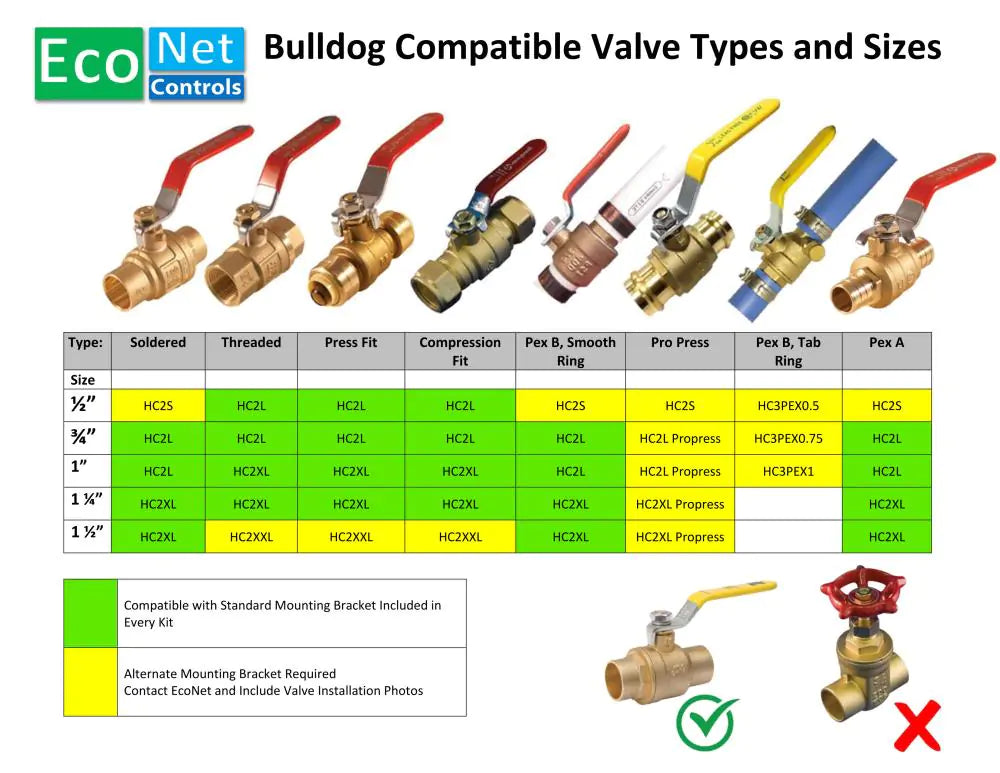
- The kit contains 2 mounting brackets designed to cover most valve types and sizes from 3/4" to 1 1/2"
- Ensure the valve is a ball valve with a handle
- If the valve requires an alternative mounting bracket or is not on the chart, custom mouting brackets are available for $30USD by contacting us at support@econetcontrols.com
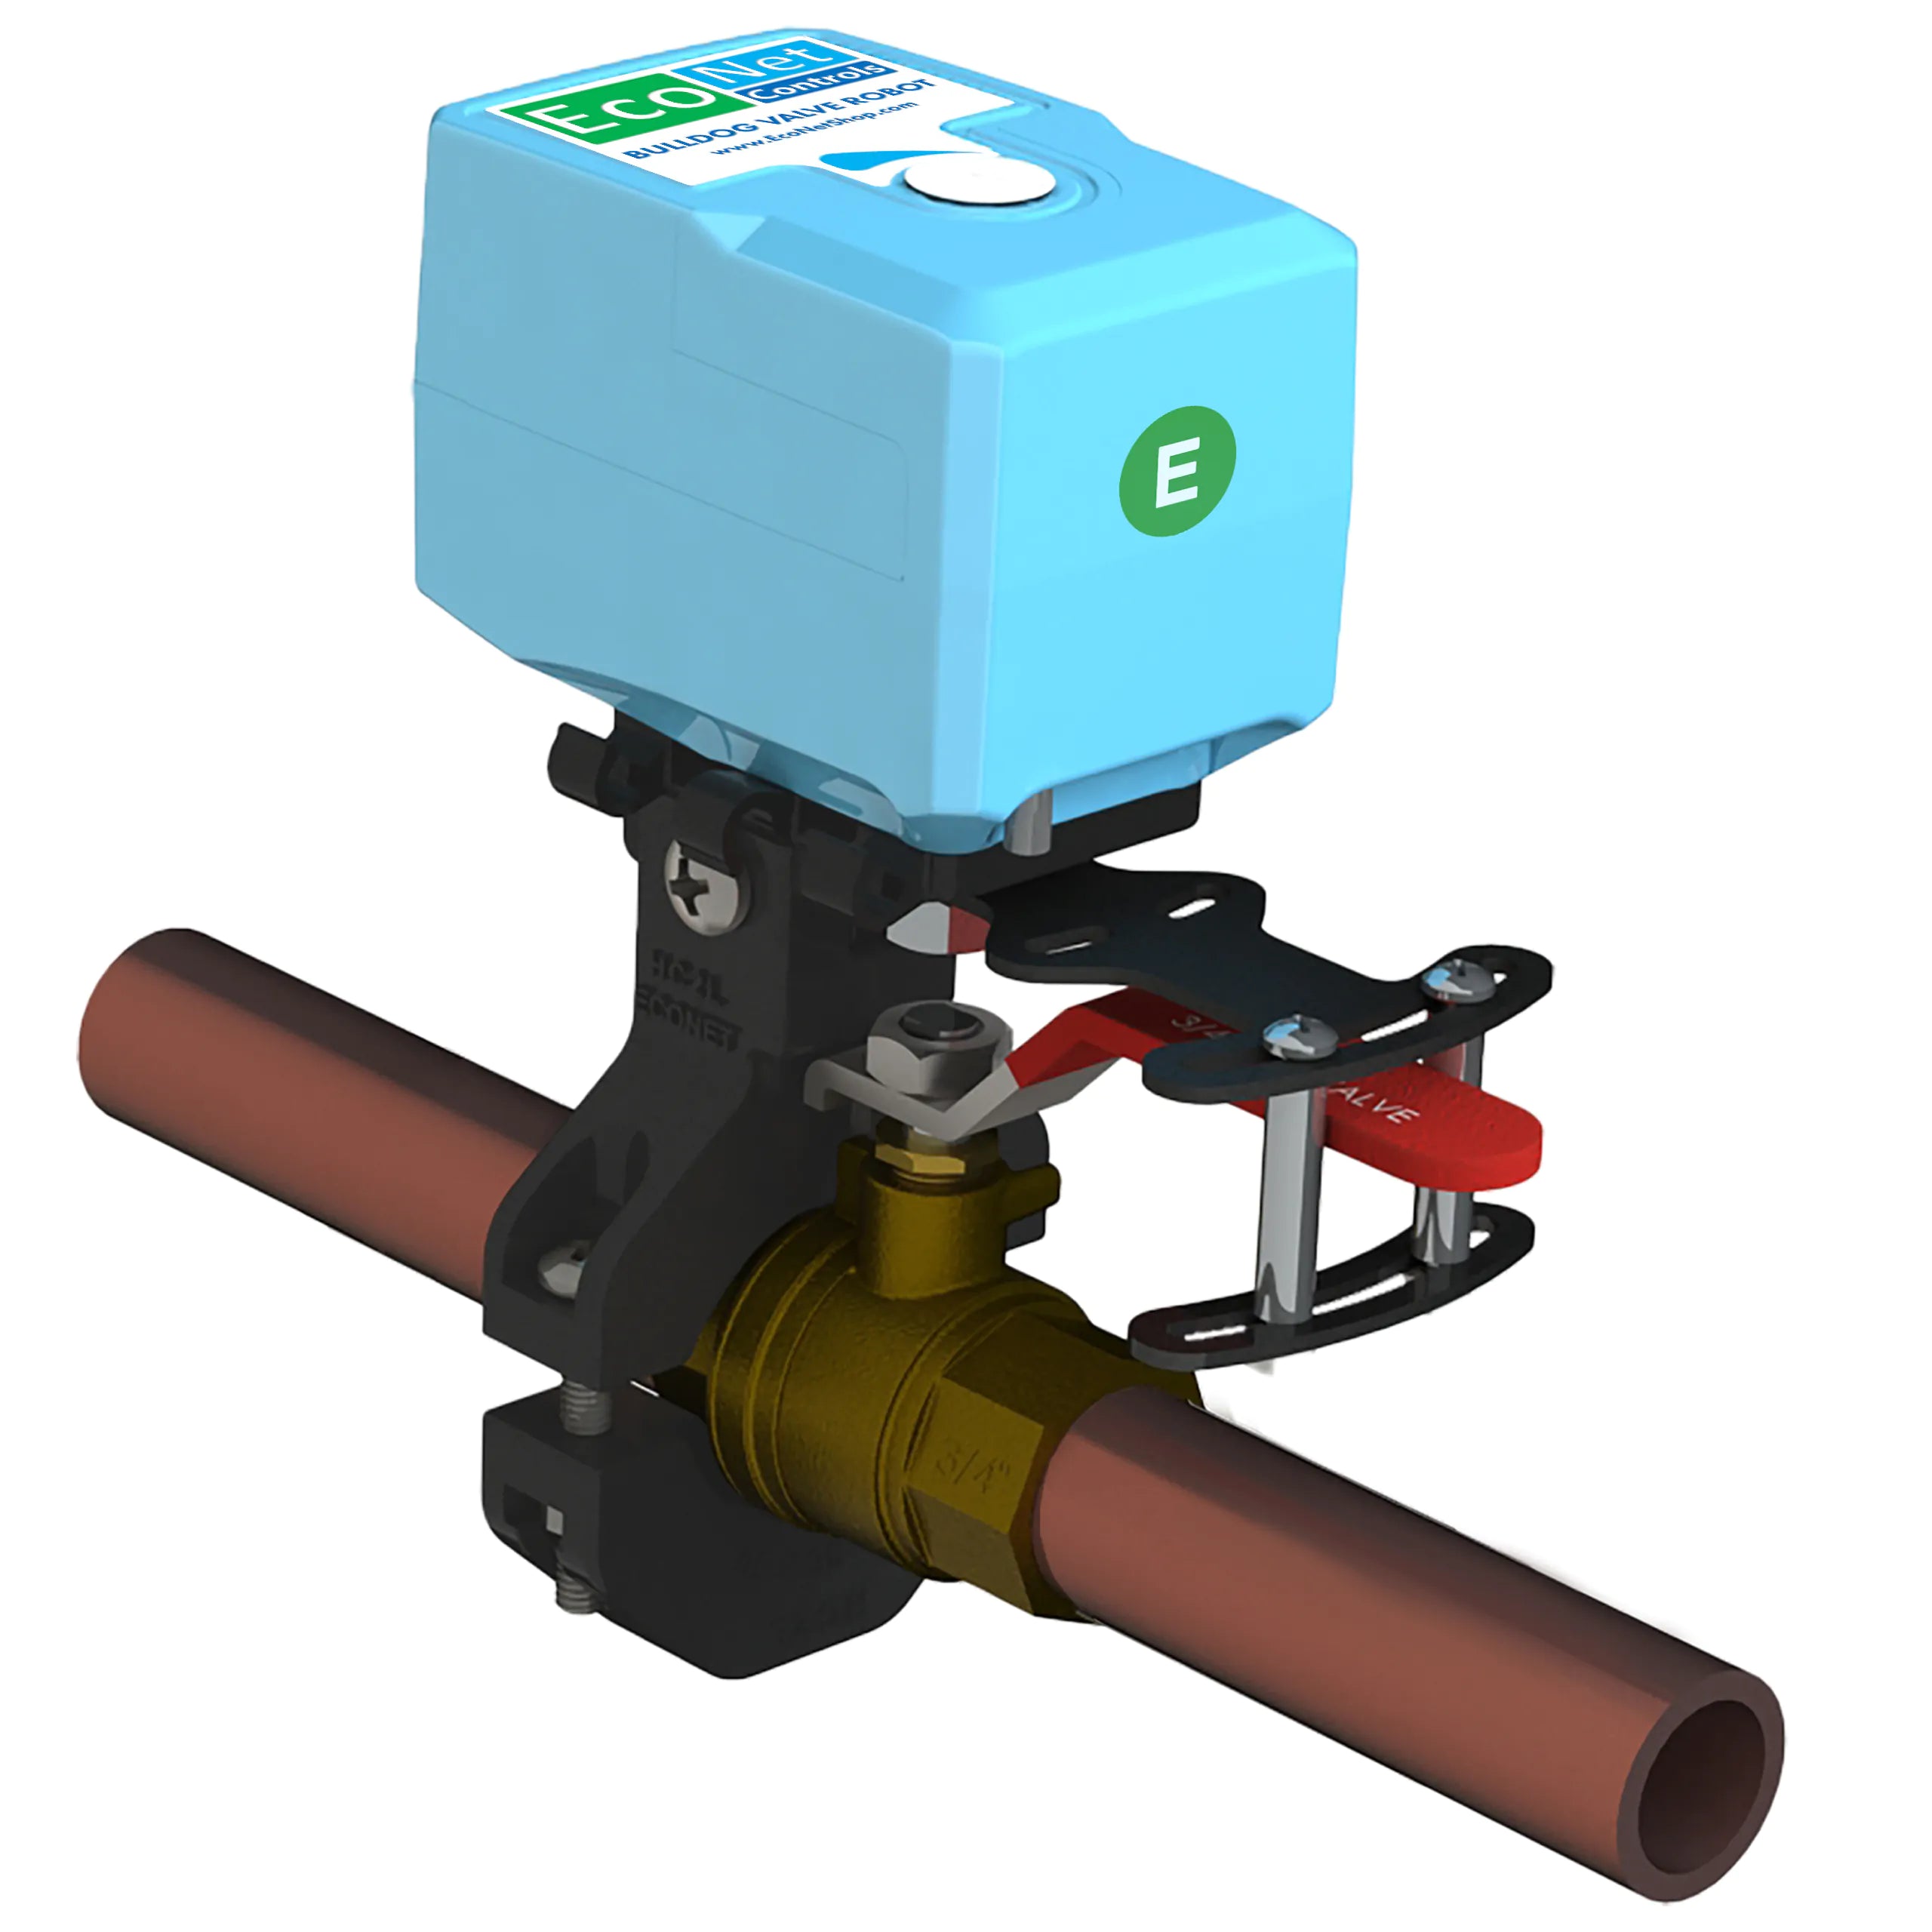
Step 2
Affix Mount to Valve
- When placing the mounting bracket onto the valve, ensure that the head on the mount is facing the ball valve handle
- IMPORTANT: Ensure that the mounting bracket is on the ball valve and NOT the pipe
- When the ball valve is open (Parallel to the valve), the mounting bracket should be on the opposite site of where the handle is facing
- Do not fully tighten screws on the mounting bracket, tighten enough for it to stay in place
Step 3
Rotational Alignment
- IMPORTANT: Rotate the mounting bracket so the center of the slot in the head of the mounting bracket aligns with the handle on the ball valve. If the mounting bracket is not properly aligned, it will result in twisting of the mount, the valve not fully closing, the motor sputtering out, or Bulldog motor arm bouncing back
- Screws on the mounting bracket should be hand tight. Sliding of the bulldog motor may be a result of the mounting bracket being too loose
- After tightening the screws, confirm mounting bracket has not moved from the aligned position
Step 4
Affixing Motor & Pivot Point Alignment
- Install mounting screw on the side of the mounting bracket with no hex nut
- Install only one mounting screw in the hole that fits, if the mounting screw does not screw into either hole, push the bulldog motor deeper into the mounting tab slot
- IMPORTANT: Ensure that the pivot point on the bulldog motor is aligned with the pivot point on the ball valve. If the pivot points are not properly aligned, it will result in twisting of the mount, the valve not fully closing, the motor sputtering out, or Bulldog motor arm bouncing back
- Mounting screw should be hand tight
Step 5
Connect Controller
- NOTE: All three Bulldog controller types are shown, while only one is included in the kit. Skip to the controller relevant to your kit
- IMPORTANT: Ensure that the Bulldog motor plug, and the Bulldog controller connector are lined up. If the pins are not aligned to the proper holes on the Bulldog controller connector, it will result in non-functionality or sputtering out of the Bulldog motor
- Ensure the Bulldog motor arm is in the fully closed position (90 degrees perpendicular to the ball valve)
- Confirm the alignment of the Bulldog motor pivot point and ball valve pivot point
Step 6
Install Mount Guide Pins
- IMPORTANT: Guide pins should be flush with the ball valve handle while tightening. The valve not fully closing may be a result of the guide pins not being flush
- Ensure the guide pins are hand tight
- Ensure guide pins are not on any angle when making contact with the valve handle
- Ensure the valve handle moves to fully closed.
- Ensure the valve opens to at least 15 degrees off of fully open. It is not critical to fully open as it does not affect water pressure or water flow in the house
Step 7
Find the Bracket for your Valve Type
- When closed, open a faucet on the highest floor of the residence and ensure water fully stops. This may take a few seconds
- Ensure the Motor and ball valve pivot points are aligned and the mounting bracket does not move when in operation
- If you continue to have issues after following this guide or have any further questions contact support@econetcontrols.com
Check out the answers to the frequently asked questions and digital guides
Check out the answers to the frequently asked questions and digital guides
Having issues after going through the self help center? Contact us for assistance
Check if your valve type and size is compatible or if an alternate mounting bracket is needed